Organisation & Tracking Setup
This guide walks through the complete setup workflow for tracking assets with Alpik Pro: managing users, creating assets, associating Alpik beacon devices, and viewing positions on the map.
Overview
The Alpik Pro console has three main sections:
| Section | Purpose |
|---|---|
| Carte | Live map view of all tracked assets |
| Analyse | Historical data and reports |
| Paramètres | Configuration: assets, users, groups, geofences |
The typical setup order is: users → assets → beacon association → map.
Managing Users
Navigate to Paramètres → Utilisateurs to view and manage the users who have access to your organisation.
The screenshot below contains real names and email addresses. Replace it with an anonymised version before publishing this page.
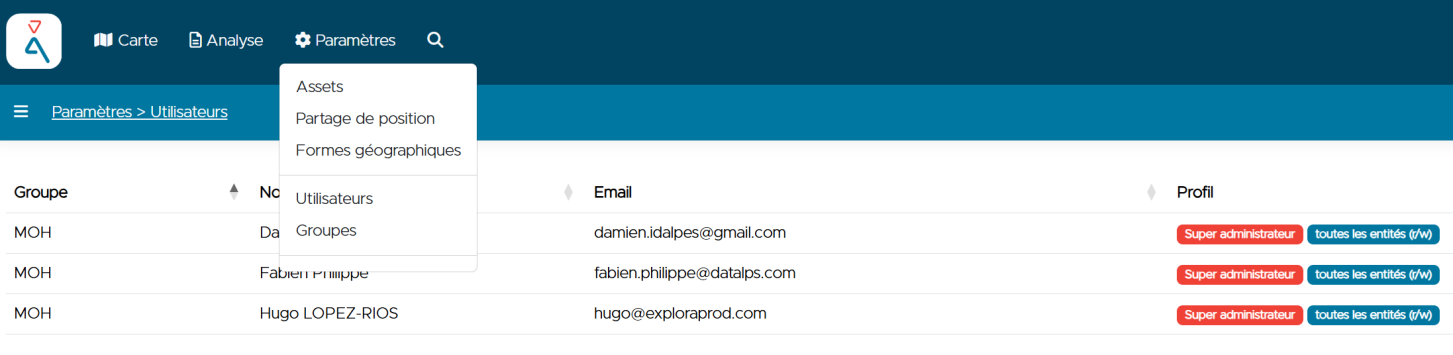
Each user entry shows:
| Column | Description |
|---|---|
| Groupe | The group the user belongs to |
| Nom | Full name |
| Login email address | |
| Profil | Role badge (e.g. Super administrateur) and entity access scope |
To add a new user, click the + button and fill in their details. The user will receive an invitation email.
Groups
Navigate to Paramètres → Groupes to organise users into groups. Groups control which assets each user can see.
Creating Assets
An asset is any object you want to track — a participant, a vehicle, a piece of equipment. Navigate to Paramètres → Assets and click + to create a new asset.
The screenshots below contain a user profile photo. Replace them with anonymised versions before publishing this page.
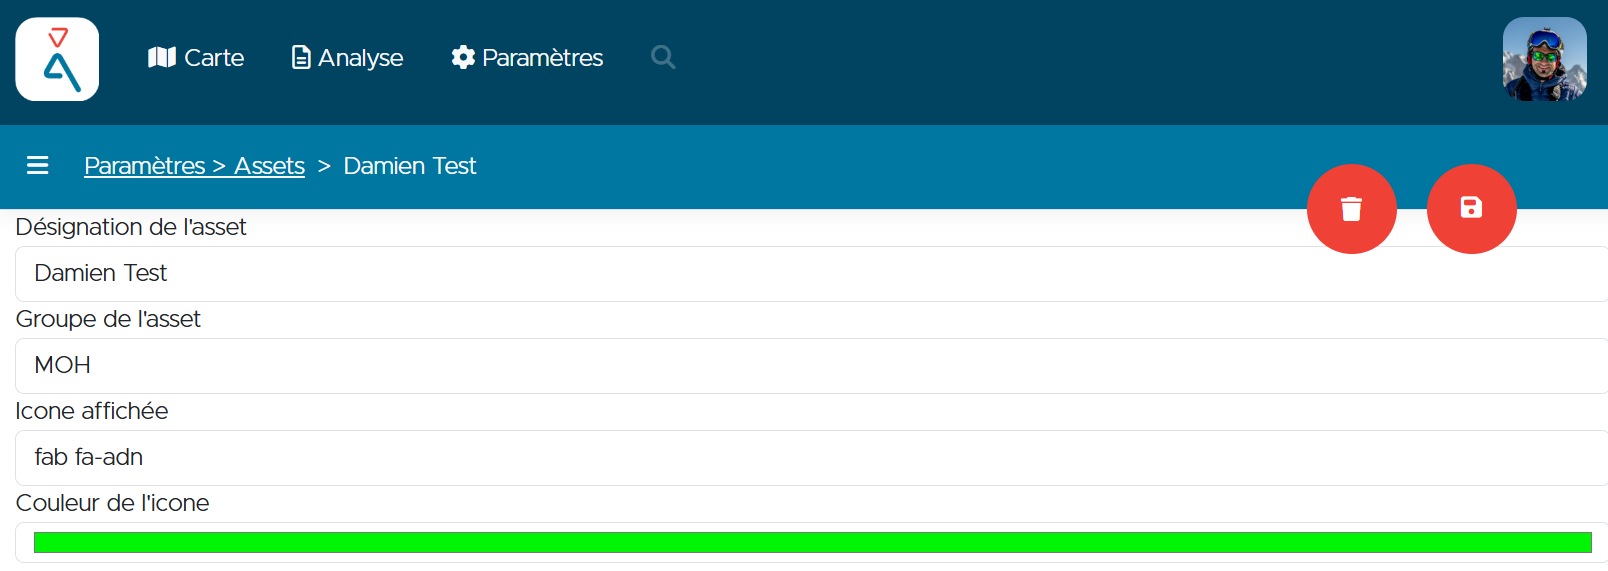
Fill in the asset form:
| Field | Description |
|---|---|
| Désignation de l'asset | Display name shown on the map and in lists |
| Groupe de l'asset | The group this asset belongs to |
| Icone affichée | Icon identifier (Font Awesome class, e.g. fas fa-person) |
| Couleur de l'icone | Icon colour shown on the map marker |
Click the save button (disk icon, top right) to save the asset.
Associating a Beacon
Once the asset is created, scroll down to the Associer une balise (Associate a beacon) section.
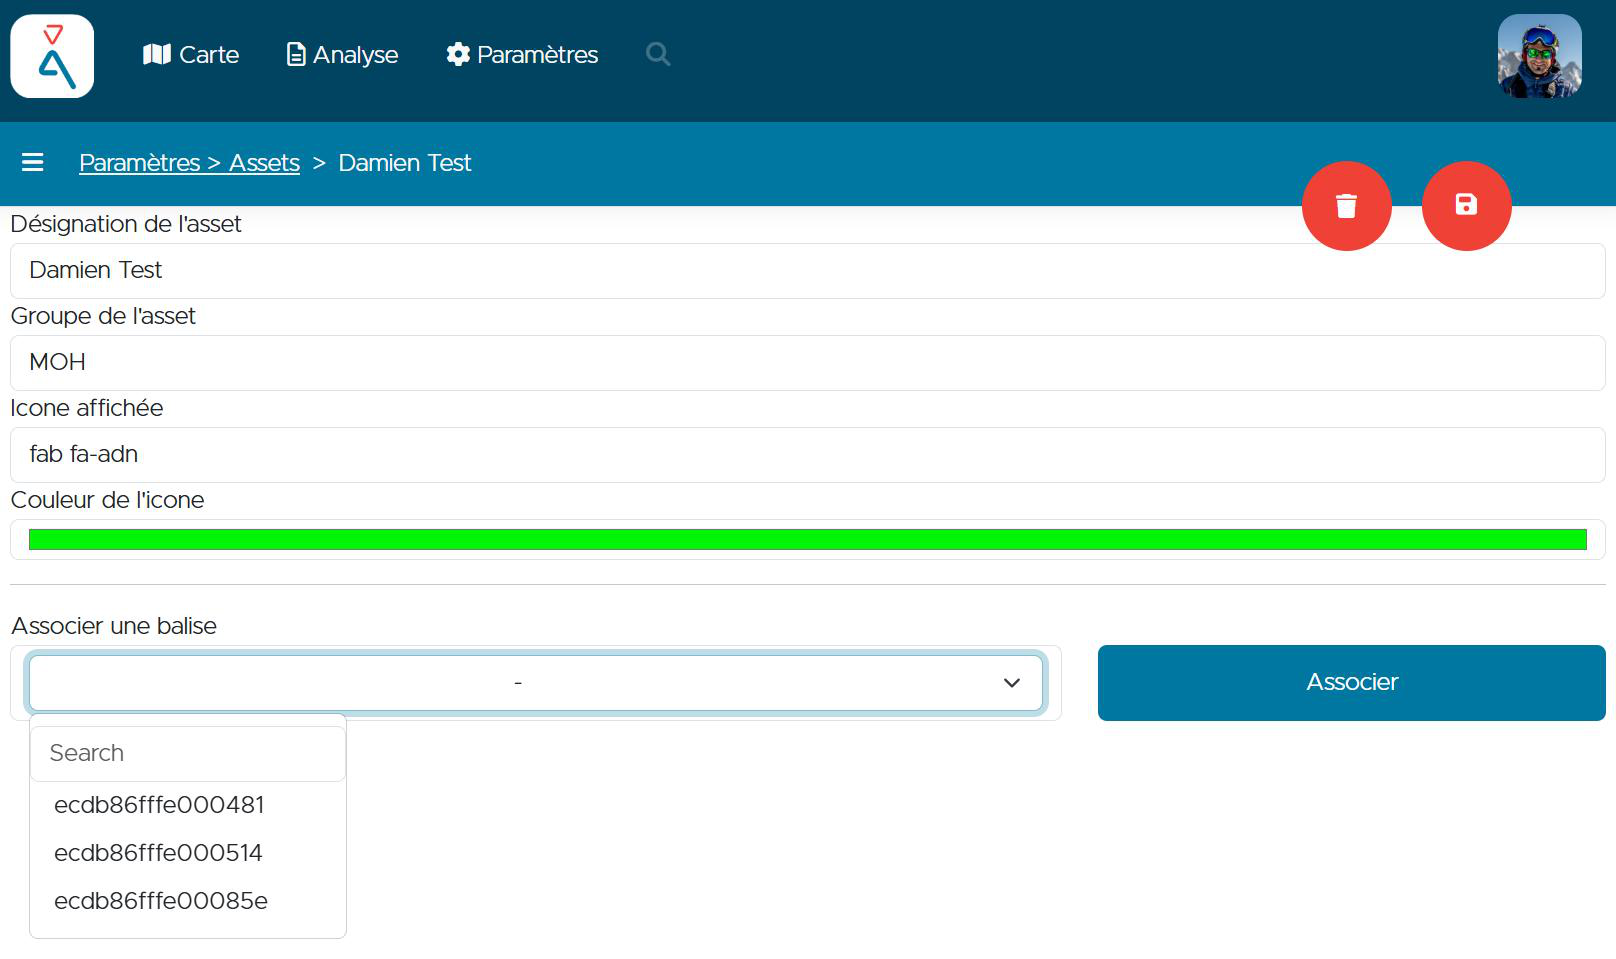
- Click the dropdown and search for the Alpik device ID you want to associate.
- Select the device from the list.
- Click Associer.
The asset is now linked to the physical Alpik beacon. When the Alpik Forwarder detects that beacon, the position data will appear on the map under this asset's name.
You can associate more than one beacon to a single asset — useful for assets that carry several Alpik devices.
Viewing the Map
Navigate to Carte to see the live positions of all your assets.
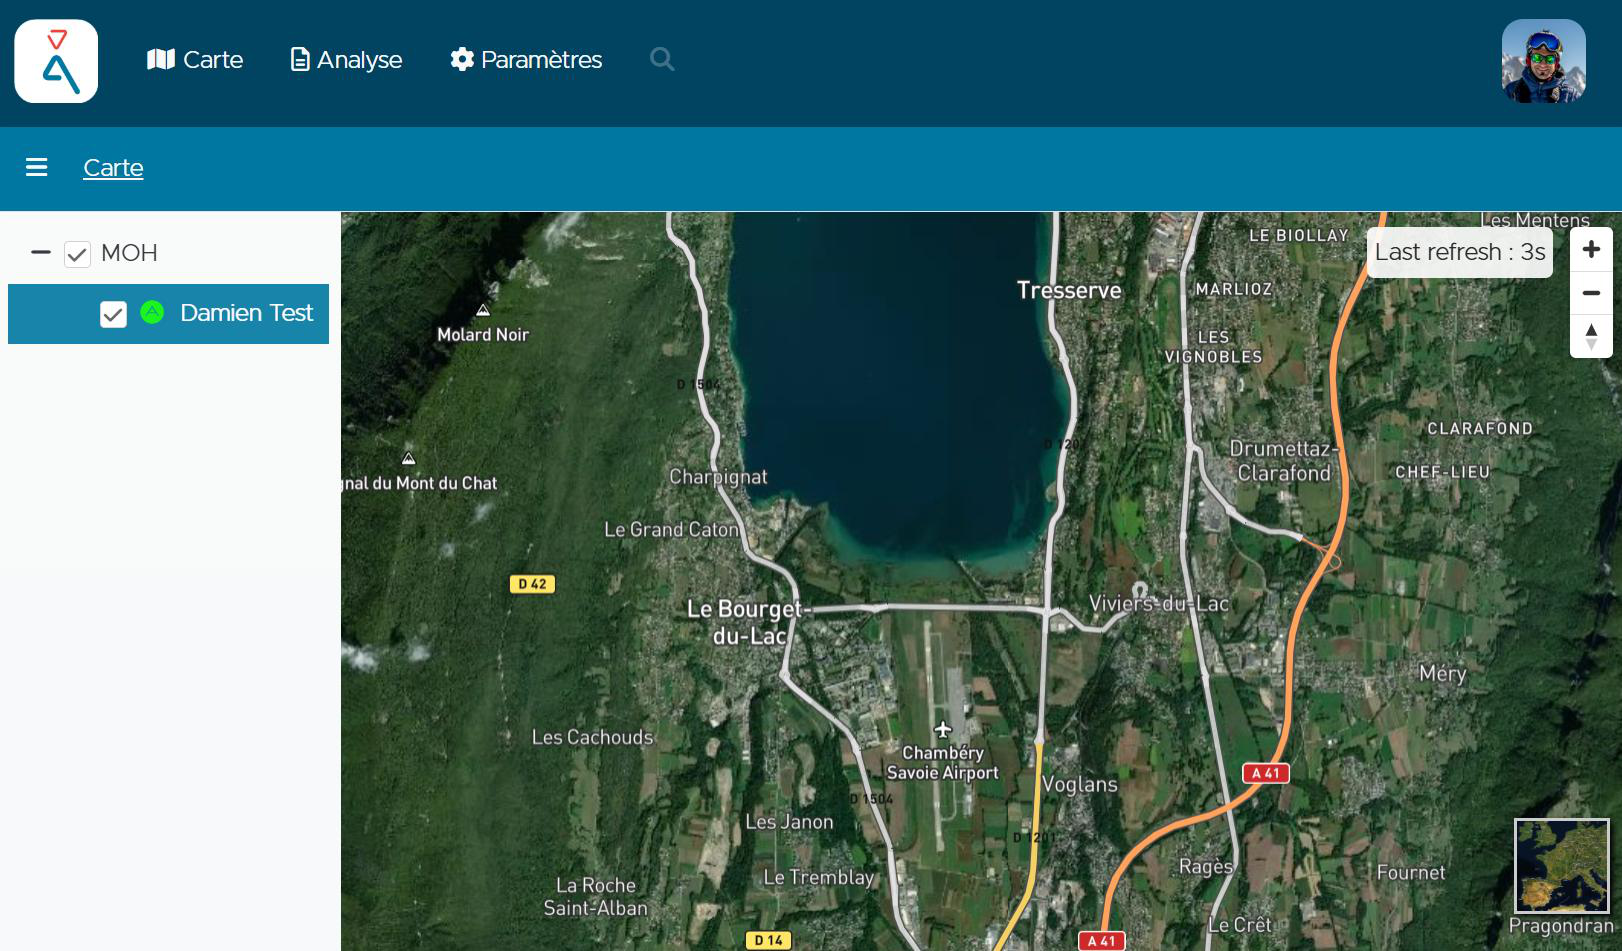
- The left panel lists your groups and assets. Use the checkboxes to show or hide them on the map.
- Each asset appears as a coloured icon at its last known position.
- The Last refresh indicator (top right of the map) shows how recent the data is.
Click on an asset marker to see its details (name, last seen timestamp, signal strength).