Account Creation
Alpik Pro uses a three-level account model:
- Organisation account — created by Alpik support when your organisation onboards.
- Administrator account — the first user account, created by Alpik support alongside the organisation. The administrator manages all other users.
- User accounts — created and managed by the administrator (or any user with admin rights) directly in the console.
This guide covers steps 1 and 2 — the initial onboarding process. Once the administrator account is active, additional users can be invited from within the console without contacting Alpik support.
Step 1 — Request your account
Send an email to contact@alpik.fr with your email address and ask for an Alpik Pro account to be created. The support team will initiate the registration process on your behalf.
Step 2 — Go to the Alpik Pro console
Open your browser and navigate to https://pro.alpik.fr.
Step 3 — Click Register
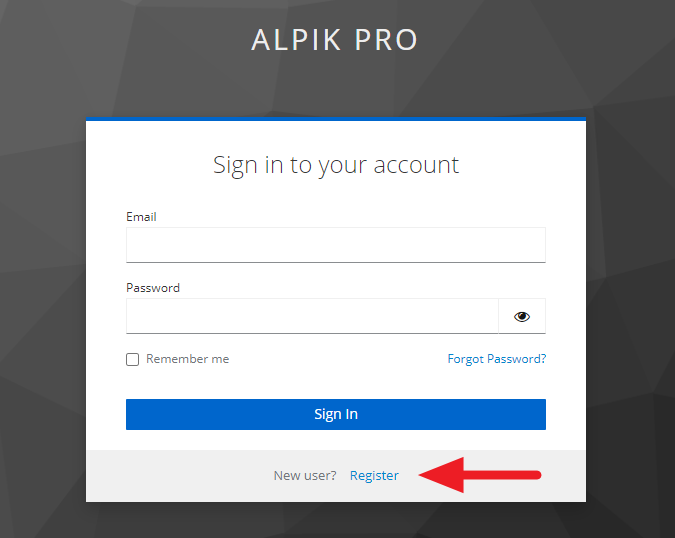
On the login page, click the Register link at the bottom of the form.
Step 4 — Fill in the registration form
Complete all required fields:
| Field | Description |
|---|---|
| Email address | The address you provided to support in Step 1 |
| Password | Choose a strong password |
| Confirm password | Re-enter your password |
| First name | Your first name |
| Last name | Your last name |
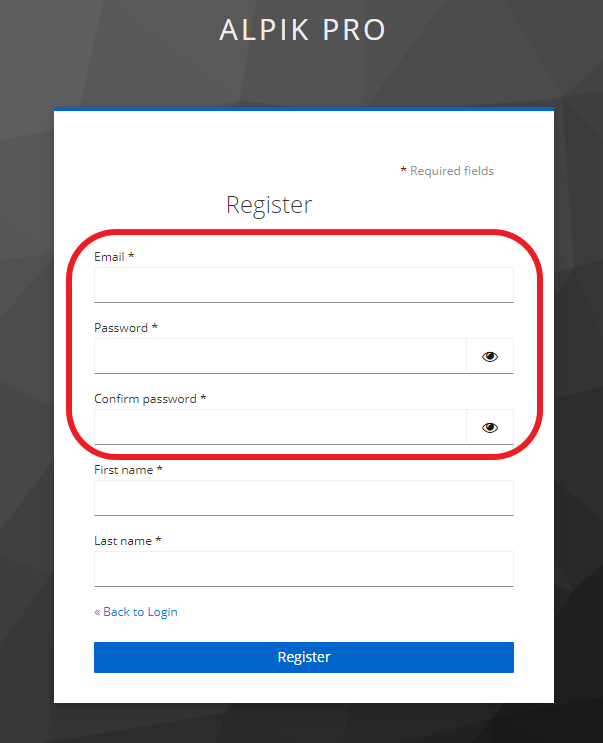
Click Register when all fields are filled in.
Step 5 — Check your confirmation email
The system automatically sends a confirmation email from pro@alpik.fr to the address you registered.
Check your spam or junk folder. If the email is not there after a few minutes, you can request a new confirmation email from the login page.
Step 6 — Validate your account
Click the validation link in the confirmation email. Your account is now active and you can log in to the Alpik Pro console.